WinUI 参考: 完整的属性表面与设计建议,参见 Items Collections。
集合是任何有点规模的应用里杠杆率最高的基元 —— 联系人列表、信息流、设置树、编辑器的行号槽。Microsoft.UI.Reactor(Reactor)提供了带类型的绑定集合(ListView<T>、GridView<T>、LazyVStack<T> / LazyHStack<T>、ItemsRepeater<T>、ItemsView<T>、TreeView<T>)和一个基于计数的虚拟化基元(VirtualList),外加用于非滚动式数据映射的内联 ForEach 辅助器。决策树从两个问题开始:数据有多大,形状是什么。几十项以内用 ListView<T>;上千项且行模板统一用 LazyVStack<T>(默认虚拟化);上百万项,或"知道总数但项尚未加载"的场景用 VirtualList;平铺网格用 GridView<T>;层级数据用 TreeView<T>;VStack 里的内联映射用 ForEach。每个集合都接受一个键选择器,让协调能跨渲染匹配各项 —— 这是唯一最需要做对的事。先扫一眼对比表,再跳到你需要的控件。
集合¶
需要渲染一份数据列表时,Reactor 提供三个带类型的集合元素和一个简单的 ForEach 辅助器。每个都接受你的数据、一个键选择器,以及一个把每项转换成元素的视图构造器函数。
示例数据¶
本页示例共用一个 Contact 记录和一份示例数据生成器:
record Contact(string Id, string Name, string Email);

static class SampleData
{
    public static readonly List<Contact> Contacts =
        Enumerable.Range(1, 50).Select(i =>
            new Contact($"c{i}", $"Contact {i}",
                $"user{i}@example.com")
        ).ToList();
}
ListView¶
ListView<T> 渲染一个可滚动的纵向列表。传入你的数据、一个为每项返回唯一键的函数,以及一个把每项变成元素的构造器:
class ListViewDemo : Component
{
    public override Element Render()
    {
        var contacts = SampleData.Contacts.Take(10).ToList();

        return VStack(12,
            SubHeading("ListView"),
            ListView<Contact>(
                contacts,
                c => c.Id,
                (contact, index) =>
                    HStack(12,
                        TextBlock(contact.Name).Bold(),
                        TextBlock(contact.Email).Opacity(0.6)
                    ).Padding(8)
            ).Height(300)
        ).Padding(24);
    }
}
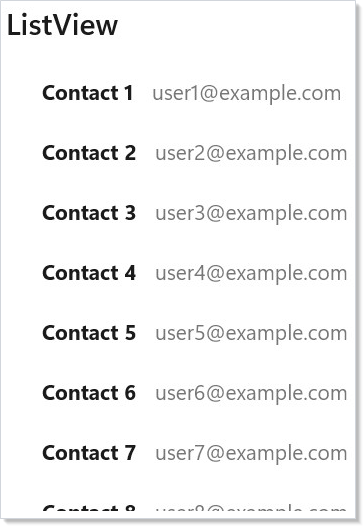
keySelector 参数(c => c.Id)告诉 Reactor 如何识别每一项。数据变化时,Reactor 用键把旧项和新项对上,只更新发生变化的部分 —— 不会整表重建。
一句话讲清键控协调¶
当你替换列表时(不可变状态进,不可变状态出),Reactor 会遍历新旧两个键序列,向底层 WinUI ListView / GridView / ItemsRepeater 发出最小的 Insert / Move / RemoveAt 操作集合。在一个 100 项的列表头部插入一项,只会有 1 行动画,而不是重新实现 100 个容器。只要 keySelector 返回的值满足以下条件,你就免费得到这一行为:
- 稳定 —— 在该项的生命周期内跨渲染保持不变。用行索引会让协调失效,产生的churn 和没有键时一样。
- 唯一 —— 在列表内不重复。重复键会触发一次批量替换的兜底退出,并在开发日志里留一条一次性诊断。
- 非空 —— null 键会让该列表的差异比对直接退出。
IReactorKeyed —— 把身份放到数据上¶
当一个模型类型自带身份时,实现 IReactorKeyed(它唯一的成员是 string Key { get; })就能在每个调用点省掉 keySelector 样板:
record Person(string Id, string Name, string Email) : IReactorKeyed
{
    string IReactorKeyed.Key => Id;
}

static class KeyedUsage
{
    // keySelector 由 IReactorKeyed.Key 推断:
    public static Element List(IReadOnlyList<Person> people) =>
        ListView<Person>(people, (person, index) => TextBlock(person.Name));

    public static Element Lazy(IReadOnlyList<Person> people) =>
        LazyVStack<Person>(people, (person, index) => TextBlock(person.Name));

    public static Element Grid(IReadOnlyList<Person> people) =>
        GridView<Person>(people, (person, index) => TextBlock(person.Name));
}
对于你并不拥有的类型(互操作 / 没有天然身份属性的第三方 POCO),显式 keySelector 重载仍然是正确选择 —— 那些就在调用点保留 c => c.Id。
手工搭建子项时用 .WithKey(item)¶
对于手工搭建的带键子项 —— FlexColumn(items.Select(…)) 之类 —— .WithKey<TKey>(TKey item) where TKey : IReactorKeyed 是 .WithKey(item.Key) 的顺手对等物:
static class HandBuiltKeyedChildren
{
    public static Element Column(IReadOnlyList<Person> people) =>
        FlexColumn(
            people.Select(p =>
                TextBlock(p.Name).WithKey(p)   // identity-on-data
            ).ToArray<Element?>()
        );
}
两种形状走的是同一套增量差异比对,因此一个手工搭建的人员 FlexColumn 会像模板化的 ListView<Person> 一样,为插入和重排做动画。
LazyVStack(虚拟化)¶
LazyVStack<T> 看起来和 ListView<T> 一样,但只为当前屏幕可见的项创建元素。把它用于大数据集:
class LazyVStackDemo : Component
{
    public override Element Render()
    {
        var contacts = SampleData.Contacts;

        return VStack(12,
            SubHeading($"LazyVStack ({contacts.Count} items)"),
            LazyVStack<Contact>(
                contacts,
                c => c.Id,
                (contact, index) =>
                    HStack(12,
                        TextBlock($"{index + 1}.").Width(30),
                        TextBlock(contact.Name).Bold(),
                        TextBlock(contact.Email).Opacity(0.6)
                    ).Padding(8)
            ).Height(300)
        ).Padding(24);
    }
}
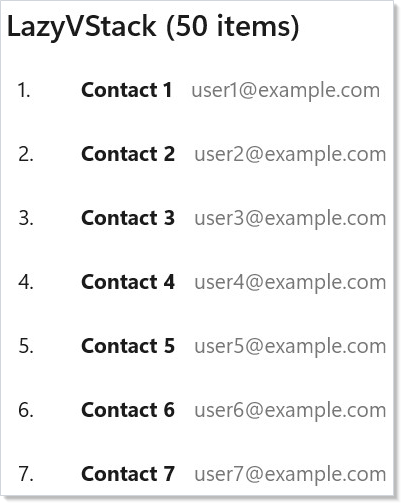
即便列表里有 50 项,LazyVStack 也只实例化你看得见的那几行。滚动时它创建新行、回收旧行。这让内存占用不随列表大小增长。
每项 Component 状态在回收时重置¶
当行构造器返回一个有状态的 Component<T> —— 即自己持有 UseState / UseEffect 的组件(行内编辑器的"脏"标记、展开/折叠开关、逐行动画)—— 那份状态是按逻辑项的,而不是按被回收的控件的。LazyVStack<T>(以及 LazyHStack<T>、ItemsRepeater<T>、ItemsView<T>)会把你的 keySelector 投影写到每行顶层 Element.Key 上。当一个已实现的行在滚动中被回收给另一个项时,新的键会强制该行干净重挂载,于是内部组件从初始状态开始,而不是继承上一项的:
static class RowStateReset
{
    // 每行拥有自己的编辑状态。把第 5 行(脏)滚到第 12 行时,绝不能带过去脏标记 ——
    // keySelector 身份保证了全新的挂载。
    public static Element Default(IReadOnlyList<Note> notes) =>
        LazyVStack<Note>(notes, n => n.Id, (note, i) =>
            Component<NoteEditor, Note>(note));
}
就地重新渲染同一个项(数据变了但键没变)则保留那份状态 —— 该行原地做差异比对,而不是重挂载。如果你刻意想要一个手工挑选的身份,在行元素上显式 .WithKey(...) 总是压过隐式的 keySelector 键:
static class RowStateExplicitKey
{
    public static Element RemountPerRevision(IReadOnlyList<Note> notes) =>
        LazyVStack<Note>(notes, n => n.Id, (note, i) =>
            Component<NoteEditor, Note>(note)
                .WithKey($"{note.Id}:{note.Revision}")); // 每次修订都重挂载
}
反过来,如果你希望某行的组件状态在回收中存活 —— 一个刻意持久化的缓存、一个长时间运行的逐行动画,或已被提升、理应比任一逻辑项活得更久的状态 —— 可以给每一行同一个常量键来退出该机制,这样回收复用就永远不会触发重挂载:
static class RowStateConstantKey
{
    // 持久延续:常量键关闭逐项重置,于是被回收的控件跨逻辑项保留其组件状态。
    public static Element Durable(IReadOnlyList<Note> notes) =>
        LazyVStack<Note>(notes, n => n.Id, (note, i) =>
            Component<NoteEditor, Note>(note).WithKey("note-row"));
}
让状态跨回收存活的更常见做法是把它提升到行之上 —— 存在父组件里(按项 id 建键)再作为 props 传下来 —— 这样行始终是数据的纯函数,回收永远不会丢东西。
ListView<T>/GridView<T>本来就在实现时为每个容器做全新挂载,因此逐项状态在那里无需额外加键就会重置。
该用哪个:
| 集合 | 虚拟化 | 最适合 |
|---|---|---|
ListView<T> |
否 | 小列表(< 50 项) |
LazyVStack<T> |
是 | 项已知的大列表 |
VirtualList |
是 | 基于计数 / 异步加载的列表 |
GridView¶
GridView<T> 把项排成自动换行的网格。框架根据项宽和可用空间决定列数:
class GridViewDemo : Component
{
    public override Element Render()
    {
        var contacts = SampleData.Contacts.Take(12).ToList();

        return VStack(12,
            SubHeading("GridView"),
            GridView<Contact>(
                contacts,
                c => c.Id,
                (contact, index) =>
                    VStack(4,
                        TextBlock(contact.Name).Bold(),
                        TextBlock(contact.Email).FontSize(12).Opacity(0.6)
                    ).Padding(12)
                     .Background(Theme.CardBackground)
                     .CornerRadius(8)
                     .Width(160).Height(80)
            ).Height(300)
        ).Padding(24);
    }
}
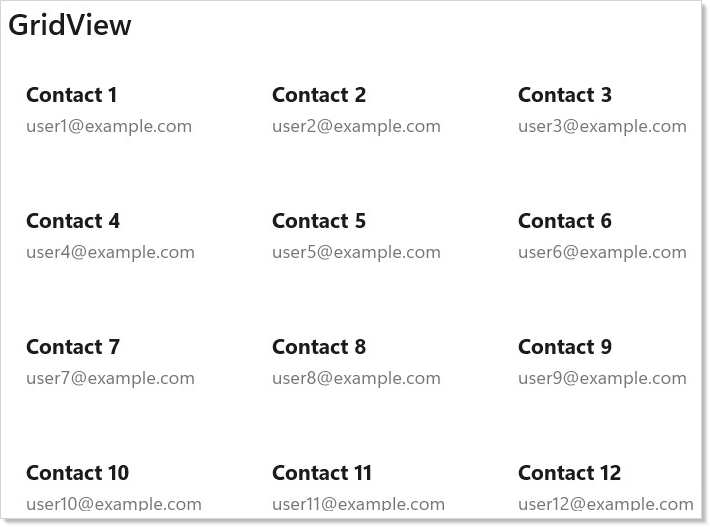
每一项的尺寸由你从视图构造器返回的元素决定。网格会根据容器宽度自动把项折成行。
VirtualList(基于计数)¶
VirtualList 提供基于计数的虚拟化 —— 你告诉它一共有多少项,它只为可见索引调用你的渲染函数。当项异步加载、或数据源只提供总数而不一次性给出全部项时,用它:
class VirtualListDemo : Component
{
    public override Element Render()
    {
        return VStack(12,
            SubHeading("VirtualList (10,000 items)"),
            VirtualList(
                itemCount: 10_000,
                renderItem: index =>
                    HStack(12,
                        TextBlock($"{index + 1}.").Width(50),
                        TextBlock($"Item {index + 1}").Bold(),
                        TextBlock($"data-{index}@example.com").Opacity(0.6)
                    ).Padding(8),
                getItemKey: index => $"item-{index}",
                itemHeight: 40
            ).Height(300)
        ).Padding(24);
    }
}
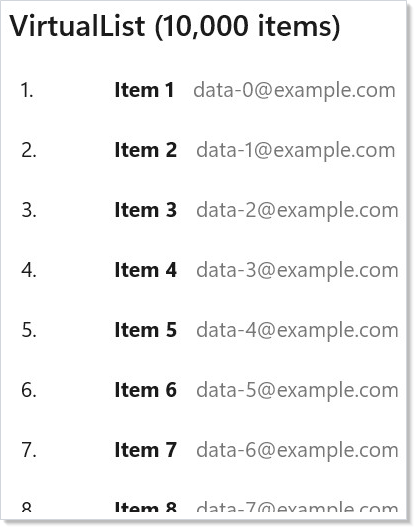
与 LazyVStack<T> 接受完整列表不同,VirtualList 接受 itemCount 和一个 renderItem(index) 回调。这让它非常适合项按需加载的分页数据源。
VirtualListRef 提供对虚拟化列表的命令式控制:
class VirtualListRefDemo : Component
{
    public override Element Render()
    {
        var listRef = UseRef<VirtualListRef?>(null);
        var (targetIndex, setTargetIndex) = UseState("5000");

        return VStack(12,
            SubHeading("VirtualListRef — Imperative Scroll"),
            HStack(8,
                TextBox(targetIndex, setTargetIndex,
                    placeholderText: "Index")
                    .AutomationName("Target index"),
                Button("Scroll To", () =>
                {
                    if (int.TryParse(targetIndex, out var idx))
                        listRef.Current?.ScrollToIndex(idx);
                })
            ),
            VirtualList(
                itemCount: 10_000,
                renderItem: index =>
                    TextBlock($"Row {index + 1}").Padding(8),
                getItemKey: index => $"row-{index}",
                itemHeight: 36,
                @ref: r => listRef.Current = r
            ).Height(250)
        ).Padding(24);
    }
}
| 成员 | 用途 |
|---|---|
ScrollToIndex(index) |
跳到指定项 |
ScrollOffset |
当前滚动位置 |
RestoreScrollOffset(offset) |
恢复已保存的滚动位置 |
Repeater |
访问底层 WinUI ItemsRepeater |
固定行高时用 itemHeight 走 O(1) 偏移计算的快路径,行高可变时用 estimatedItemHeight 配合自动测量。用 onVisibleRangeChanged 在用户滚动时按块加载数据。
跨回收记忆化行¶
虚拟化列表在滚动时回收容器。在可变行高的列表上,ItemsRepeater 回收得很激进,默认情况下每次回收都会重建那一行的元素树并做差异比对 —— 即使该行的数据没变。当某一行是某个稳定键的纯函数时,Memo<TKey> 可以消掉这次重建:
static class RowMemo
{
    public static Element Rows(IReadOnlyList<Note> notes) =>
        LazyVStack<Note>(notes, n => n.Id, (note, i) =>
            Memo(note.Id, () =>                 // ← 先给键,再给行工厂
                Border(
                    VStack(4,
                        TextBlock(note.Title).SemiBold(),
                        Caption(note.Body).Foreground(Theme.SecondaryText)
                    )
                ).Padding(12)));
}
Memo(key, factory) 把 factory 返回的元素缓存在一个按 key 建键、容量有界的逐列表缓存里。当一次回收再次请求一个仍在缓存中的键时,它返回同一个元素实例,于是协调器的 ReferenceEquals 快捷路径生效,该行的差异比对被整体跳过(亚微秒级),而不用遍历子树。它是可选启用的 —— 你不包裹的列表行为完全照旧 —— 并且适用于所有由 ElementFactory 支撑的集合:VirtualList、LazyVStack<T>、LazyHStack<T>、ItemsView<T>、ItemsRepeater<T>,以及 DataGrid 的行。
把修饰符(和附加状态)放在工厂内部。 缓存只对行构造器返回的裸 Memo(key, …) 生效 —— 不能有流畅修饰符、不能有 .WithKey(…)、包装器上也不能有附加属性 / .Provide(…) / 主题绑定。给包装器加装饰(Memo(id, () => …).Padding(8))会让那一行退出缓存,并静默丢掉性能收益。把它们放到工厂返回的元素上:Memo(id, () => Border(…).Padding(8))(如上所示)。
纯度契约 —— 键必须涵盖工厂读取的每一个输入。 缓存看不穿你的闭包。如果工厂读了任何没有折进键的东西 —— 一个选中标记、当前主题、一个展开开关 —— 那么缓存实例会被直接返回,而那次变更静默丢失。这是作者的责任,不是框架的。把键扩成元组,这样任一输入变化键就跟着变:
class RowMemoTupleKey : Component<Note>
{
    Element RowBody(Note note, bool isSelected) =>
        TextBlock(note.Title).SemiBold().Opacity(isSelected ? 1.0 : 0.6);

    public override Element Render()
    {
        var note = Props;
        var (isSelected, _) = UseState(true);
        var isDark = UseIsDarkTheme();

        // 行的外观同时取决于选中状态和主题,所以两者都要进键。
        return Memo((note.Id, isSelected, isDark), () => RowBody(note, isSelected));
    }
}
当行就是该项的纯函数时,用整个项记录做键(Memo(note, …))是最简单的安全选择 —— 记录按值比较,所以任一字段变化都是新键。
Memo(key, …) 不是 Memo(ctx => …)。 两者同名,但编译器按参数形状选择。Memo(key, factory) 是这里的跨回收行缓存。Memo(ctx => …, deps) 是渲染期的子树跳过 —— 它让一棵子树在父级重新渲染时被冻结。它们还能与 UseMemoCells 组合:UseMemoCells 在父级重新渲染时跳过单元格构建,而 Memo(key, …) 额外在纯滚动回收时也跳过 —— 那种情况下根本没有重新渲染发生。
缓存策略。 一个有界的 LRU,默认容量 128(大约是典型实现窗口的几倍),因此它绝不随列表长度增长 —— 滚动一个百万行列表,最多只保持 128 条热条目,超出就淘汰最久未用的。每当列表的项或行构造器被替换时(与 Reactor 内部视图缓存失效的边界相同),缓存会自动清空,因此新的构造器闭包永远不可能返回旧闭包构建的实例。
在虚拟化列表之外, Memo(key, factory) 是一个透明但带键的包装器:同键重新渲染是一次空操作(工厂不会被再次调用,子树也不会被差异比对),键变了则替换内部(卸载 + 全新挂载一个新的 factory() 结果)。跨回收缓存只在虚拟化列表的工厂持有该缓存时才会发生;作为普通子元素(比如 VStack 的子元素),它是一个安全的、带键的空操作。
没有该 API 时的逃生舱¶
Memo<TKey> 是官方支持的路径,但同样的想法今天就能用一个你自己持有的普通字典实现 —— 在没有该 API 的 Reactor 构建上,或当你想完全掌控缓存生命周期时很顺手。自己按键缓存元素实例,命中时返回缓存的那个,这样协调器的 ReferenceEquals 跳过依然生效:
class ManualRowCache : Component<IReadOnlyList<Note>>
{
    public override Element Render()
    {
        // 通过 UseRef 持在父组件里,因此能跨重新渲染存活。
        var cache = UseRef(new Dictionary<string, Element>()).Current;

        Element Row(Note note)
        {
            if (!cache.TryGetValue(note.Id, out var el))
                cache[note.Id] = el = Border(TextBlock(note.Title)); // 每个 id 只构建一次
            return el;                                              // 复用时返回同一实例
        }

        return LazyVStack<Note>(Props, n => n.Id, (note, i) => Row(note));
    }
}
代价是 Memo 替你处理的那些部分得自己扛:给字典设上界(做淘汰,让它无法无限增长),并在某个键背后的数据变化时丢弃或重建对应条目 —— 也就是上面那份纯度契约,改由手工执行。
ForEach¶
对于小的、非虚拟化的内联列表,用 ForEach。它把集合映射成元素,而不创建可滚动容器:
class ForEachDemo : Component
{
    public override Element Render()
    {
        var colors = new[]
        {
            ("Primary", Theme.Accent), ("Secondary", Theme.AccentSecondary),
            ("Tertiary", Theme.AccentTertiary), ("Subtle", Theme.SubtleFill)
        };

        return VStack(12,
            SubHeading("ForEach (non-virtualized)"),
            HStack(8,
                ForEach(colors, ((string Name, ThemeRef Brush) color) =>
                    Border(
                        TextBlock(color.Name)
                            .Padding(horizontal: 8, vertical: 16)
                    )
                        .Background(color.Brush)
                        .CornerRadius(4)
                        .WithKey(color.Name)
                )
            )
        ).Padding(24);
    }
}
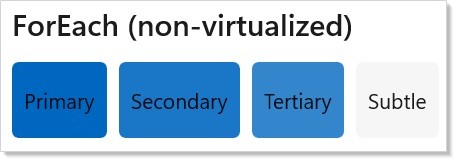
ForEach 是 items.Select(render).ToArray() 的便利写法,可以直接用在元素树里。当你想在更大的布局里内联一小串项时用它。
用 SelectionChanged 做多选¶
ListView、GridView、ListBox 以及带类型的同类(ItemsView<T>、TemplatedListView<T>、TemplatedGridView<T>)都暴露一个通用的 SelectionChanged 流畅方法用于多选场景。设置 SelectionMode = Multiple(或 Extended),处理器会在每次变化时带着完整选择的快照触发 —— 而不是增删增量:
class MultiSelectDemo : Component
{
    public override Element Render()
    {
        var contacts = SampleData.Contacts.Take(10).ToList();
        var initialSelectedIds = UseMemo(() => new List<string>());
        var (selectedIds, setSelectedIds) = UseState(initialSelectedIds);

        return VStack(12,
            SubHeading($"{selectedIds.Count} selected"),
            ListView<Contact>(
                contacts,
                c => c.Id,
                (contact, index) =>
                    HStack(12,
                        TextBlock(contact.Name).Bold(),
                        TextBlock(contact.Email).Opacity(0.6)
                    ).Padding(8)
            )
            .Set(lv => lv.SelectionMode =
                Microsoft.UI.Xaml.Controls.ListViewSelectionMode.Multiple)
            .SelectionChanged(selected =>
                setSelectedIds(selected.Select(c => c.Id).ToList()))
            .Height(300)
        ).Padding(24);
    }
}
处理器签名随元素类型而变:
| 元素 | 处理器 |
|---|---|
ListView、GridView、ListBox |
Action<IReadOnlyList<int>>(选中索引) |
ItemsView<T>、TemplatedListView<T>、TemplatedGridView<T> |
Action<IReadOnlyList<T>>(选中项) |
快照语义与 CalendarView.SelectedDatesChanged 一致 —— 你拿到的列表是当前完整选择,而不是自上次调用以来的变化。给该流畅方法传 null 会清除先前设置的处理器。
TreeView的多选被有意推迟了 —— 理由参见 spec 039 §5.8。在那之前先用单选的OnItemInvoked。
用 WithKey 建立稳定身份¶
渲染动态列表时,始终用 .WithKey() 给每一项一个稳定键。没有键时,Reactor 按位置匹配项 —— 增删一项会导致其后每一项都被重建:
class WithKeyDemo : Component
{
    record FruitItem(string Id, string Name);

    public override Element Render()
    {
        var initialItems = UseMemo(() => new List<FruitItem>
        {
            new("fruit-1", "Apple"),
            new("fruit-2", "Banana"),
            new("fruit-3", "Cherry")
        });
        var (items, updateItems) = UseReducer(
            initialItems);
        var (newItem, setNewItem) = UseState("");
        var (nextId, setNextId) = UseState(4);

        return VStack(12,
            SubHeading("Stable Identity with WithKey"),
            HStack(8,
                TextBox(newItem, setNewItem, placeholderText: "New item")
                    .AutomationName("New item"),
                Button("Add", () => {
                    if (!string.IsNullOrWhiteSpace(newItem)) {
                        var name = newItem.Trim();
                        updateItems(l => [.. l, new FruitItem($"fruit-{nextId}", name)]);
                        setNextId(nextId + 1);
                        setNewItem("");
                    }
                })
            ),
            VStack(4, items.Select((item, _) =>
                HStack(8,
                    TextBlock(item.Name),
                    Button("Remove", () => updateItems(
                        l => l.Where(x => x.Id != item.Id).ToList()))
                        .AutomationName($"Remove {item.Name}")
                ).WithKey(item.Id)
            ).ToArray())
        ).Padding(24);
    }
}
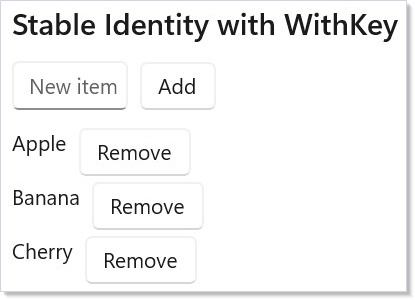
带类型的集合(ListView<T>、LazyVStack<T>、GridView<T>)通过 keySelector 参数自动处理键,ForEach 对实现了 IReactorKeyed 的项同样如此。你只有在三种情况下才需要手工 .WithKey():Select().ToArray()、对不带身份的项用 ForEach,或你想要一个不同于 item.Key 的键。
好键的规则:
- 使用数据里的稳定标识符(数据库 ID、唯一名称)。避免用数组索引做键 —— 那会违背键的意义。
- 键在其兄弟列表内必须唯一。 重复会导致未定义的协调行为。
- 键应当是字符串。
WithKey(string)是基础修饰符。对于实现了IReactorKeyed的类型,还有WithKey<TKey>(TKey item),它会替你读取item.Key。
分组¶
Reactor 没有内置分组列表控件。组合配方很直接:用 LINQ 分组,然后为每个分组渲染一个 标题头 + 项 的 VStack。每个分组的主体是它自己的带类型集合,因此如果你把 ForEach 换成 LazyVStack<T>,虚拟化在每个分区内依然生效:
class GroupingDemo : Component
{
    public override Element Render()
    {
        var grouped = SampleData.Contacts
            .Take(24)
            .GroupBy(c => c.Name[0])
            .OrderBy(g => g.Key)
            .ToList();

        // Reactor 没有内置分组列表控件;改为为每个分组组合
        // 一个「标题头 + 项」的 VStack。每个分组的渲染函数交回它自己的
        // 带类型集合,因此如果把 ListView 换成 LazyVStack,
        // 虚拟化在每个分区内依然生效。
        return VStack(8,
            SubHeading($"Grouped: {grouped.Count} sections"),
            ScrollView(
                VStack(16,
                    ForEach(grouped, group =>
                        VStack(4,
                            TextBlock($"— {group.Key} —").Bold()
                                .Opacity(0.7),
                            ForEach(group.ToArray(), c =>
                                HStack(8,
                                    TextBlock(c.Name).Bold(),
                                    TextBlock(c.Email).Opacity(0.6))
                                    .WithKey(c.Id))
                        ).WithKey($"group-{group.Key}"))
                ).Padding(8)
            ).Height(300)
        ).Padding(24);
    }
}
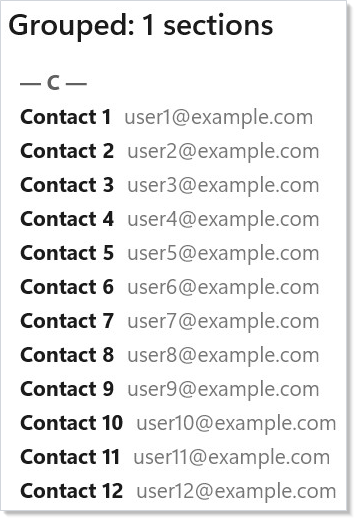
这个形状可以推广到两级分组(城市 → 国家)、吸顶标题头(通过 Border 修饰符设置 Position)和可折叠分区(把每个分组的主体包在 When(expanded[key], ...) 里)。因为每个分组的集合都有自己的键控渲染,项可以跨渲染在分组之间移动而不重挂载 —— 键跟着项走。
拖拽重排¶
WinUI ListView 和 GridView 自带拖拽重排,Reactor 在一等的流畅方法推出之前,通过 .Set 直通暴露相关属性。三个属性把这个表面打开 —— CanReorderItems、AllowDrop 和 CanDragItems。下面的紧凑片段展示了这几个 WinUI 开关;对于有状态支撑的列表,需要通过底层 ItemsSource 集合或 DragItemsCompleted 处理器把新顺序回写进你的状态:
class DragReorderDemo : Component
{
    public override Element Render()
    {
        var initialItems = UseMemo(() => new List<string> { "Alpha", "Bravo", "Charlie",
            "Delta", "Echo", "Foxtrot" });
        var (items, setItems) = UseState(initialItems);

        // Reactor 通过底层 WinUI ListView 的
        // CanReorderItems / AllowDrop / CanDragItems 暴露拖拽重排。
        // 在一等流畅方法推出之前,.Set 直通是受支持的逃生舱。
        // 下面链接的范例展示了如何把一次拖放回写进应用状态。
        return VStack(8,
            SubHeading("Drag to reorder"),
            ListView<string>(
                items,
                s => s,
                (item, _) =>
                    HStack(8,
                        TextBlock("☰").Opacity(0.4),
                        TextBlock(item).Bold()
                    ).Padding(8))
                .Set(lv =>
                {
                    lv.CanReorderItems = true;
                    lv.AllowDrop = true;
                    lv.CanDragItems = true;
                })
                .Height(260)
        ).Padding(24);
    }
}
| 属性 | 效果 |
|---|---|
CanDragItems |
用户可以从某一行发起拖拽。 |
AllowDrop |
列表接受拖放。 |
CanReorderItems |
列表内的拖放执行重排;列表外的拖放触发 DragItemsCompleted。 |
GridView 和 ItemsView<T> 暴露同样三个属性。要在两个列表之间做自由形态的拖放(把项从 A 移到 B),订阅源列表的 DragItemsStarting 和目标列表的 Drop,然后更新两边的状态。recipes/drag-reorder 范例把单列表场景从头走到尾。
懒加载¶
对于总数已知但项增量加载的数据源(分页 API、大型本地存储),VirtualList 上的 onVisibleRangeChanged 回调就是加载触发器。可见窗口变化时回调就会触发;把尾沿与你的高水位标记比较,当用户滚过它时就请求下一页:
class LazyLoadingDemo : Component
{
    public override Element Render()
    {
        // 假装已「加载」到某个高水位标记;当可见范围越过
        // 未加载区域时就取新项。
        var (loadedTo, setLoadedTo) = UseState(50);
        var totalCount = 1_000;

        return VStack(8,
            SubHeading($"Lazy-load — fetched {loadedTo} of {totalCount}"),
            VirtualList(
                itemCount: totalCount,
                renderItem: index =>
                    index < loadedTo
                        ? HStack(8,
                            TextBlock($"{index + 1}.").Width(50),
                            TextBlock($"Row {index + 1}").Bold(),
                            TextBlock($"loaded").Opacity(0.6))
                            .Padding(8)
                        // 尚未加载索引的骨架屏。
                        : HStack(8,
                            TextBlock($"{index + 1}.").Width(50),
                            TextBlock("loading…").Opacity(0.4))
                            .Padding(8),
                getItemKey: index => $"lazy-{index}",
                itemHeight: 40,
                // 可见范围变化时观察器触发 ——
                // 底部越过当前上限时就抬高水位标记。
                onVisibleRangeChanged: (first, last) =>
                {
                    if (last >= loadedTo - 5 && loadedTo < totalCount)
                        setLoadedTo(Math.Min(loadedTo + 50, totalCount));
                }
            ).Height(300)
        ).Padding(24);
    }
}
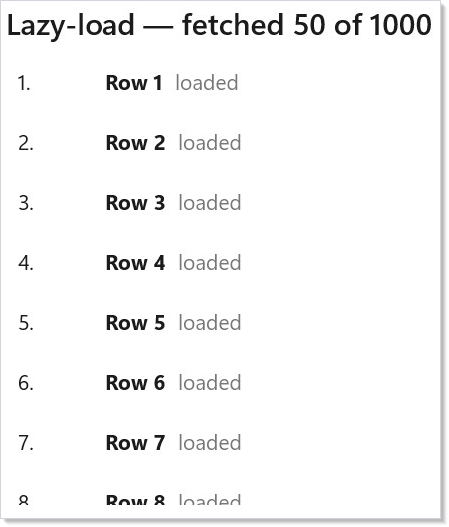
把它与 UseResource 配对来管理异步获取状态 —— Pending 变成骨架行,Loaded 变成填充好的行,Error 变成行内重试。完整形态见 recipes/paginated-list 范例。
注意:
itemHeight与estimatedItemHeight之争是VirtualList里最贵的一个决定。设了itemHeight,滚动条位置是 O(1) —— 索引乘以行高。不设的话,列表要测量每一个见过的行并维护一张累计偏移表;滚动条近似值会漂移,大跨度跳转可能引发测量风暴。只要行高统一就设itemHeight—— 对分页数据、消息列表和表格状 UI,这几乎总是正确选择。只有当行高确实参差(瀑布流信息流、带富附件的聊天)时才退到estimatedItemHeight。默认的estimatedItemHeight: 40是个猜测值;把它调到真实行高的 ±25% 以内,才能把滚动条漂移压住。
模式¶
带字母跳转的虚拟化联系人¶
把分组(每个字母一个分区)与 VirtualListRef 的命令式滚动结合起来:用户点一个字母,列表就对该分组的第一行调用 ScrollToIndex。这是通讯录应用里经典的"A-Z 快速索引"模式:
class LetterJump : Component<IReadOnlyList<Person>>
{
    static IReadOnlyDictionary<char, int> ComputeStartIndices(
        IReadOnlyList<Person> people) =>
        people
            .Select((p, i) => (Letter: p.Name[0], Index: i))
            .GroupBy(x => x.Letter)
            .ToDictionary(g => g.Key, g => g.First().Index);

    public override Element Render()
    {
        var contacts = Props;
        var listRef = UseRef<VirtualListRef?>(null);
        var groupStarts = UseMemo(() => ComputeStartIndices(contacts), contacts);

        Element RenderRow(int i) => TextBlock(contacts[i].Name).Padding(8);

        return HStack(0,
            VirtualList(contacts.Count, RenderRow,
                getItemKey: i => contacts[i].Id,
                itemHeight: 60,
                @ref: r => listRef.Current = r).Width(360),
            VStack(2,
                ForEach("ABCDEFGHIJKLMNOPQRSTUVWXYZ".ToCharArray(), letter =>
                    Button(letter.ToString(), () =>
                    {
                        if (groupStarts.TryGetValue(letter, out var start))
                            listRef.Current?.ScrollToIndex(start);
                    }).AutomationName($"Jump to {letter}")
                        .WithKey(letter.ToString())))
        );
    }
}
提升选择状态以跨重挂载存活¶
选择状态属于父级,绝不属于集合。父级持有选中 ID 的 HashSet<TKey>;行模板每次渲染检查成员关系来设置 IsSelected。这个模式能扛住数据刷新、排序变化、筛选变化和重挂载 —— 如果选择状态住在列表内部,这些情况都会丢。与 forms.md 里的表单状态是同一个形状。
常见错误¶
用数组索引做键¶
class WithKeyDemo : Component
{
    record FruitItem(string Id, string Name);

    public override Element Render()
    {
        var initialItems = UseMemo(() => new List<FruitItem>
        {
            new("fruit-1", "Apple"),
            new("fruit-2", "Banana"),
            new("fruit-3", "Cherry")
        });
        var (items, updateItems) = UseReducer(
            initialItems);
        var (newItem, setNewItem) = UseState("");
        var (nextId, setNextId) = UseState(4);

        return VStack(12,
            SubHeading("Stable Identity with WithKey"),
            HStack(8,
                TextBox(newItem, setNewItem, placeholderText: "New item")
                    .AutomationName("New item"),
                Button("Add", () => {
                    if (!string.IsNullOrWhiteSpace(newItem)) {
                        var name = newItem.Trim();
                        updateItems(l => [.. l, new FruitItem($"fruit-{nextId}", name)]);
                        setNextId(nextId + 1);
                        setNewItem("");
                    }
                })
            ),
            VStack(4, items.Select((item, _) =>
                HStack(8,
                    TextBlock(item.Name),
                    Button("Remove", () => updateItems(
                        l => l.Where(x => x.Id != item.Id).ToList()))
                        .AutomationName($"Remove {item.Name}")
                ).WithKey(item.Id)
            ).ToArray())
        ).Padding(24);
    }
}
索引键违背了键的意义。列表重排或某项被移除时,其后每一项都拿到新键、每一行都重挂载、行内每个文本输入都丢焦点、动画全部重启。请用数据里的稳定标识符。
等高 VirtualList 却没设 itemHeight¶
// 不要这样:
VirtualList(itemCount, RenderItem, getItemKey: GetKey)
// estimatedItemHeight 默认 40 —— 任何实际高度不同的行都会累积漂移。
class VirtualListDemo : Component
{
    public override Element Render()
    {
        return VStack(12,
            SubHeading("VirtualList (10,000 items)"),
            VirtualList(
                itemCount: 10_000,
                renderItem: index =>
                    HStack(12,
                        TextBlock($"{index + 1}.").Width(50),
                        TextBlock($"Item {index + 1}").Bold(),
                        TextBlock($"data-{index}@example.com").Opacity(0.6)
                    ).Padding(8),
                getItemKey: index => $"item-{index}",
                itemHeight: 40
            ).Height(300)
        ).Padding(24);
    }
}
如果你的行全都等高(常见情况),就告诉列表。O(1) 的偏移运算比累计测量表快得多,而且滚动条跟踪的是真实位置而非估算值。
提示¶
明智地使用 keySelector。 键必须能跨渲染唯一标识每一项。数据库 ID 或 GUID 是理想选择。避免 i.ToString() 这类基于索引的键 —— 项被重排或移除时它们会崩。
超过 handful 数量就优先用 LazyVStack<T>。 虚拟化的开销可以忽略,而大列表下的内存节省很可观。
保持视图构造器简单。 你传给 ListView<T> 的函数会在每次渲染时对每个可见项跑一遍。把复杂的项布局抽成自己的 Component<TProps> 以获得自动记忆化。
内联列表用 ForEach,可滚动列表用带类型集合。 ForEach 不创建滚动容器 —— 它只是把数据映射成元素。可滚动内容请用 ListView<T> 或 LazyVStack<T>。
别忘了 index 参数。 所有视图构造器都收到 (T item, int index)。用索引做展示(行号),但不要用它做键。